Try Hack Me Reverse Engineering Writeup

Hello and welcome!
Before we begin, a quick heads up that we will be reversing mainly on Radare2, so get yours ready if you haven’t already had one! Otherwise, feel free to use any disassemblers of your choice!
Here’s the link to the Reverse Engineering room on Try Hack Me, which is what we’ll be focusing on later on. Also, consider starting with the much more beginner friendly Reversing ELF room if you’re new to reversing!
With that said, let’s begin!
Crackme1
This first crackme file will give you an introduction to if statements and basic function calling in assembly.

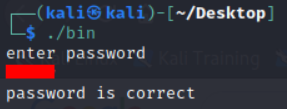
With ‘test’ provided to the password prompt, the binary returns a string of “password is incorrect”.
_________________________________________________________________

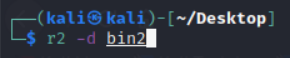
Disassembling the crackme1 binary with Radare2.
_________________________________________________________________

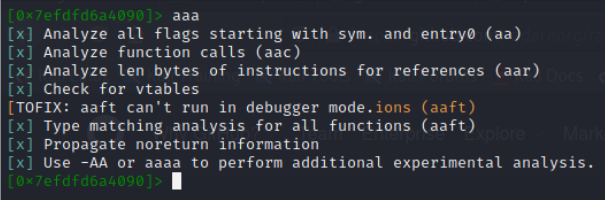
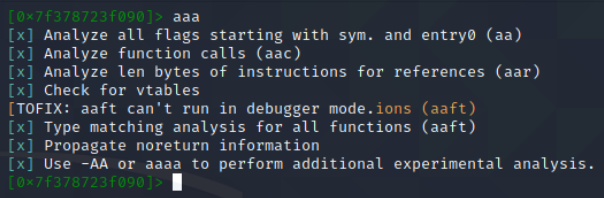
Running aaa command to analyze all functions within the binary
_________________________________________________________________

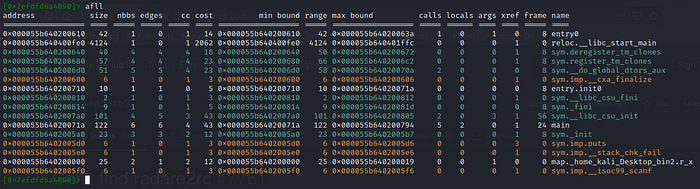
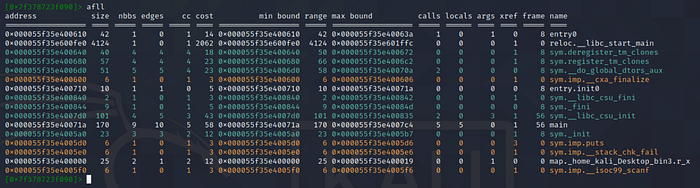
afll to list out details of all functions. We’ll first start with disassembling of the main function.
_________________________________________________________________

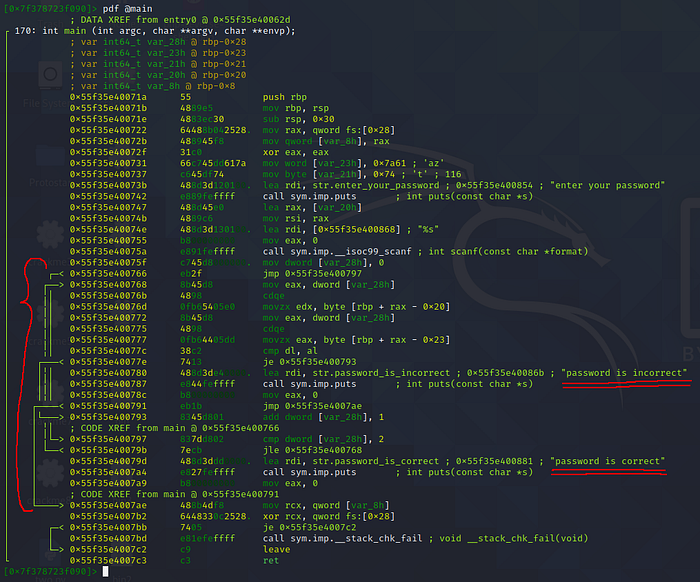
pdf @main to disassemble the main function. By this point you should be able to spot the flag pretty easily already.
Now that we’ve obtained the flag, let’s try diving a little deeper and get a better understanding of those assembly instructions!
_________________________________________________________________
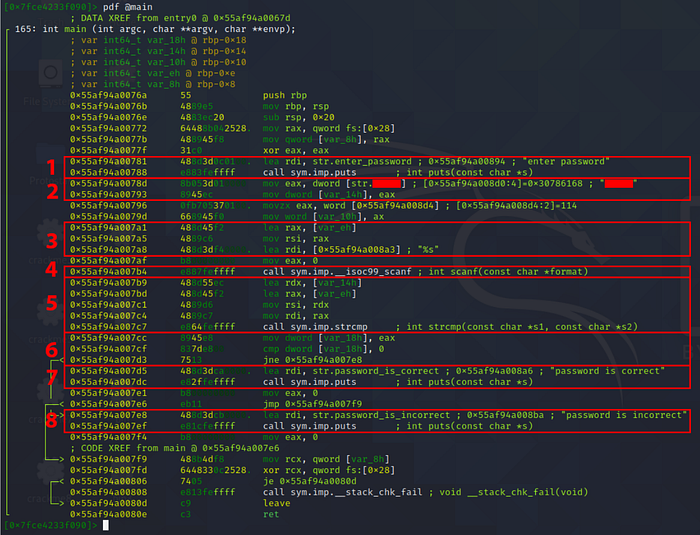
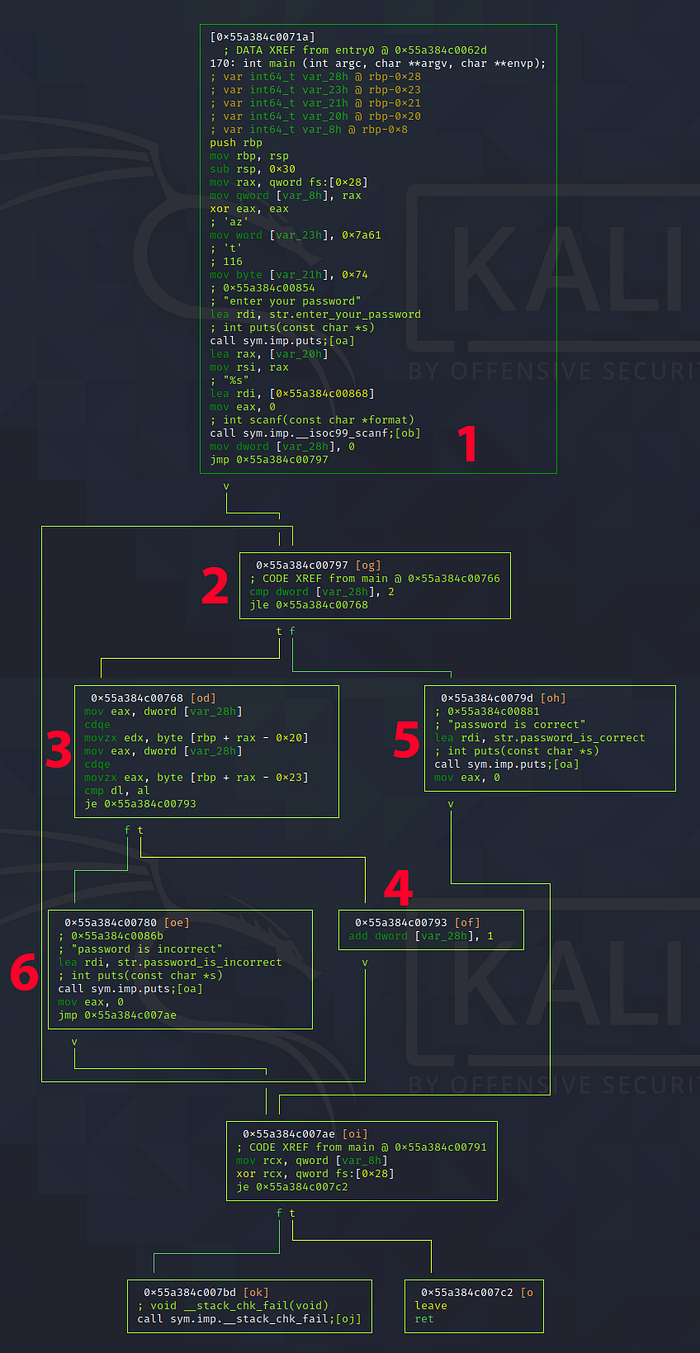
From what we could observe, there seems to be 8 important segments of code. Their explanations are as following:
- Print “enter password” string.
- Store the flag into var_14h.
- Load the address of var_eh into rax, then copies it to rsi, such that rsi would have the address of var_eh. Also load an address in the memory which contains %s into rdi.
These two arguments, rsi and rdi will be used as parameters for the calling of scanf() in 4. - rdi (which contains %s) tells the scanf function it should expect a string input, whereas rsi (which contains memory address of var_eh) tells scanf() where to store the string input.
- Load the address of var_14h into rdx, then copies it to rsi.
Load the address of var_eh into rax, then copies it to rdi.
In a sense, rsi would contain address of the flag, rdi would contain address of our string input. They will be used as parameters for calling of strcmp().
eax will be used to store the return value of strcmp(), 0 if both strings are equal, non-zero if they aren’t. - Copy eax to var_18h, then compare it against 0.
Jump to 8 if they aren’t equal, otherwise proceed to 7. - Print “password is correct”.
- Print “password is incorrect”.
Feel free to take a moment to digest/understand all these steps!
_________________________________________________________________
Flag verification.
Crackme2
This is the second crackme file — Unlike the first file, this will involve examining registers, how and where values are compared

Nothing too special, this is done mostly to observe how the strings correlates with the behavior of the binary.
_________________________________________________________________
Disassembling the crackme2 binary with Radare2.
_________________________________________________________________
aaa to analyze all functions within the binary.
_________________________________________________________________
afll to list out details of all functions. Again, we’ll first start with disassembling of the main function.
_________________________________________________________________
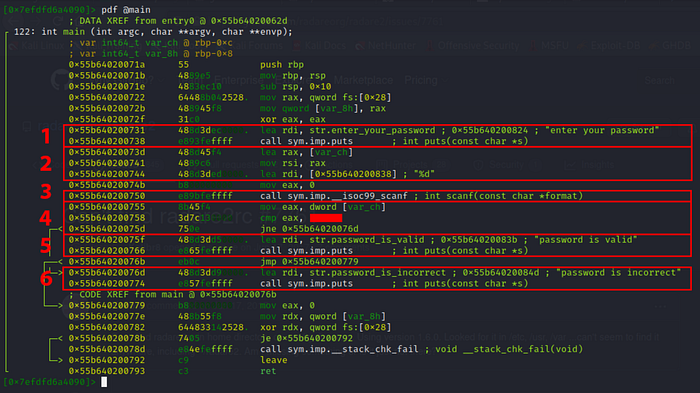
Unlike the previous crackme, there seems to be no obvious sign of flags in this one. But one thing for sure, we are trying to get the code in the 5th segment to execute. So, let’s begin with another round of analysis.
- Print “enter your password” string.
- Load the address of var_ch into rax, then copies it to rsi, such that rsi would have the address of var_ch. Also loads an address in the memory which contains %d into rdi.
These two arguments, rsi and rdi will be used as parameters for the calling of scanf() in 3. - rdi (which contains %d) tells the scanf function it should expect a decimal integer input, whereas rsi (which contains memory address of var_ch) tells scanf() where to store the string input.
Since scanf() is only taking in decimal integers, there’s a slight chance which our flag might be an integer of some sort! - Copy the value of var_ch (our decimal integer input!) to eax, then compare it against a hex value.
Jump to 6 if they aren’t equal, otherwise proceed to 5.
As such, the hex value should be our flag! - Print “password is valid”.
- Print “password is incorrect”.
Overall, the assembly code of crackme2 is more straight-forward in comparison with crackme1.
_________________________________________________________________
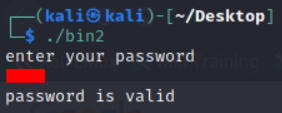
Flag verification.
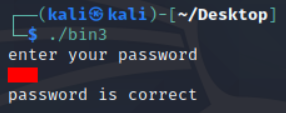
Crackme3
This crackme will be significantly more challenging — it involves learning how loops work, and how they are represented in assembly
Unlike the previous ones, the third challenge will require us to carry over what we’ve learned earlier, and observe how they are incorporated into loops.
_________________________________________________________________
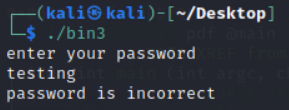
Cool, got our good old “password is incorrect”.
_________________________________________________________________

Disassembling the crackme3 binary with Radare2.
_________________________________________________________________
aaa to analyze all functions within the binary.
_________________________________________________________________
afll to list out details of all functions. Let’s start disassembling the main function.
_________________________________________________________________
Looks like we’ve got something interesting going on in the middle. Let’s switch over to graph view to get a better view.
_________________________________________________________________

sf main to seek to address of main function.
VV to switch to visual mode and view graphs.
_________________________________________________________________
Some rough explanations:
- Takes in our input, also initiates the loop counter to 0.
- Condition check for the loop, goes to 3 (flag check) if the loop counter is less than or equal to 2, otherwise proceed to 5.
- Flag check, compares our input one character at a time against the flag. Goes to 4 (counter increment) if they match, otherwise proceed to 6.
- Increment loop counter by 1.
- Print “password is correct”.
- Print “password is incorrect”.
Thus, our goal is to figure out the input needed for crackme3 to execute in the following order: 1234 →234 →234 →25
_________________________________________________________________
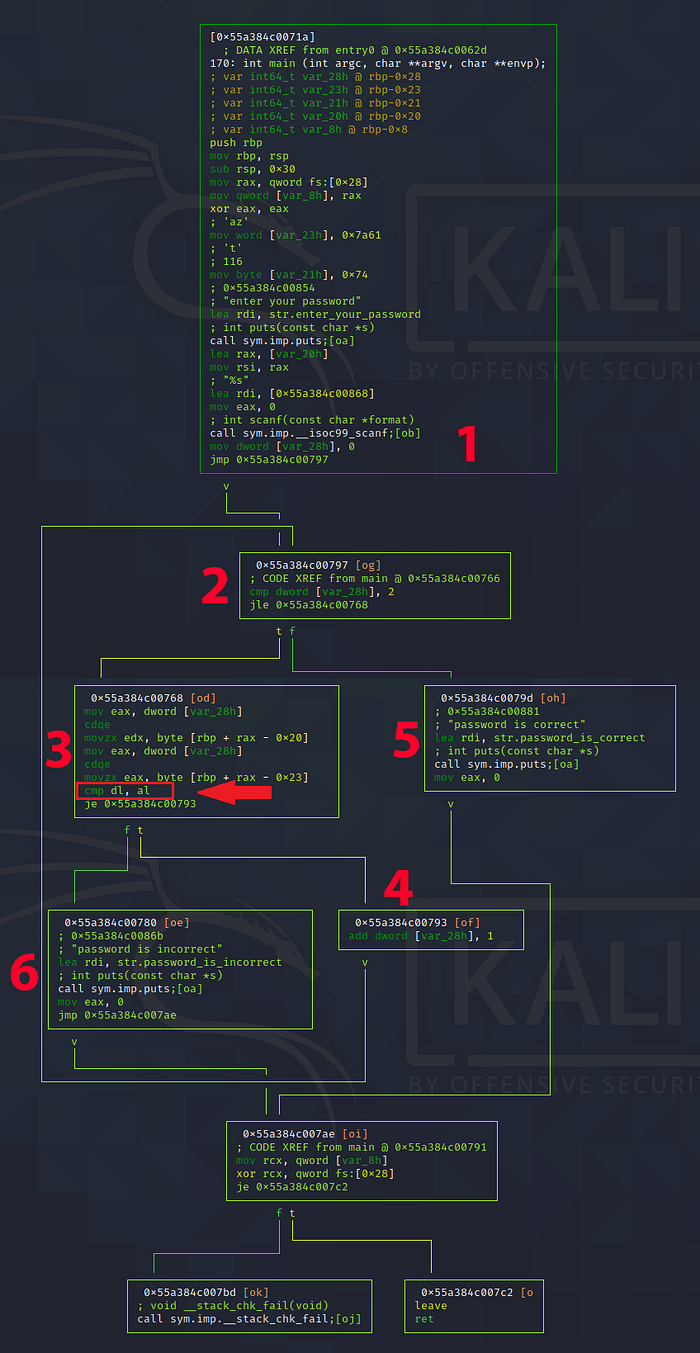
There are lots of methods to go about obtaining the flag, but the easiest way should be observing how our input affects the highlighted instruction in the figure above, as it directly decides if the loop counter should be incremented (which we obviously want it to).
_________________________________________________________________
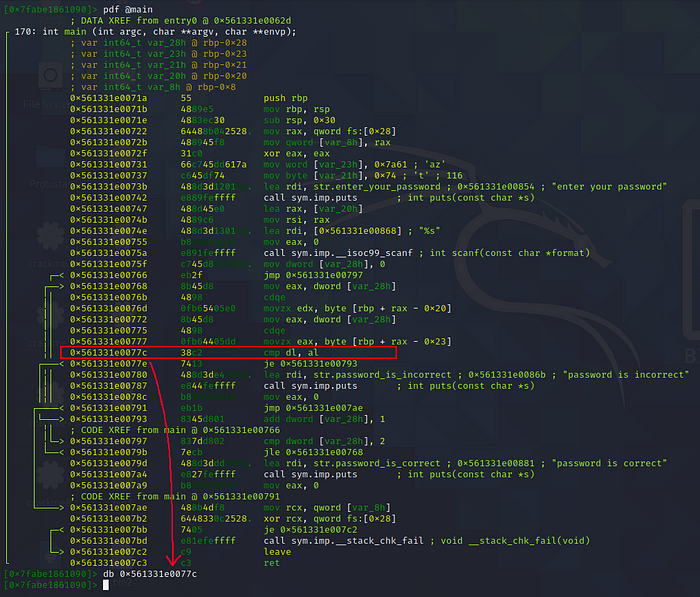
Press q 2 times to return to CLI interface.
db 0x561331e0077c to set breakpoint at the specified instruction.
We’ll try to observe how our input values affect those two registers (dl, al).
_________________________________________________________________

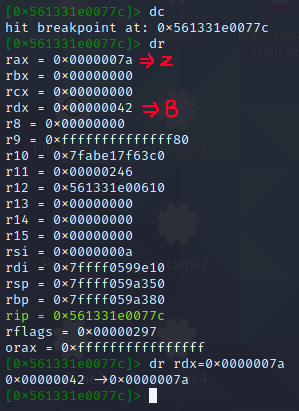
- dc to start start/continue execution.
- We’ll provide an input of ABCD (0x41, 0x42, 0x43, 0x44), just because they are easier to spot in the memory.
- dr to show value stored in registers. As a side note, dl is the lowest 8 bit of rdx, al is the lowest 8 bit of rax.
Interesting… It seems that rdx contains the hex value from the first character (A) of our input string.
Furthermore, it is being compared against rax, 0x00000061, which means… The first character of our flag is an a!
Feel free to take a moment to understand how/why it is so.
Got it? We’ll modify the value of the rdx register to match rax before continuing execution, so that the loop doesn’t break.
_________________________________________________________________
Hit our second breakpoint, same concept as before, we’ll modify rdx register to match rax, the second character of the flag.
_________________________________________________________________
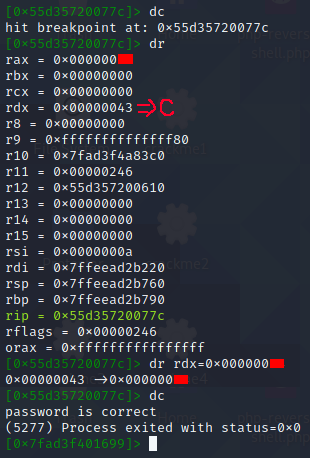
Last character of the flag.
_________________________________________________________________
Voila!
Overall, it was a decent learning experience and I’ve had lots of eureka moments throughout these crackmes!